TestDisk: undelete file for FAT
This Recovery example guides you through TestDisk step by step to undelete files from the FAT (FAT12/FAT16/FAT32) and VFAT filesystem. FAT is mainly used on memory cards from digital cameras and on USB keys. VFAT can be found mainly on external harddisks formated under Windows. It's possible to recover your deleted files. When a file is deleted, the filename is marked as deleted and the data area as unallocated/free, but TestDisk can read the deleted directory entry and find where the file began. If the data area hasn't been overwritten by a new file, the file is recoverable.
Running TestDisk executable
If TestDisk is not yet installed, it can be downloaded from TestDisk Download. Extract the files from the archive including the sub-directories.
To recover a lost partition or repair the filesystem from hard disk, USB key, Smart Card, etc., you need enough rights to access a physical device.
 Under DOS, run TestDisk.exe
 Under Windows, start TestDisk (ie
 testdisk-7.0/testdisk_win.exe) from an account in the Administrator Group. Under Unix/Linux/BSD, you need to be root to run TestDisk (ie.
 sudo testdisk-7.0/testdisk_static) Under MacOSX, start TestDisk (ie
 testdisk-7.0/testdisk). If you are not root, will restart itself using sudo after confirmation from your part. Under OS/2, TestDisk doesn't handle physical device, only a disk image. Sorry.
To recover a partition from a media image or repair a filesystem image, run
testdisk image.ddto carve a raw disk imagetestdisk image.E01to recover files from an Encase EWF imagetestdisk 'image.???'if the Encase image is split into several files.
![]()
![]() To repair a filesystem not listed by TestDisk, run
To repair a filesystem not listed by TestDisk, run testdisk device, i.e.
testdisk /dev/mapper/truecrypt0ortestdisk /dev/loop0to repair the NTFS or FAT32 boot sector files from a TrueCrypt partition. The same method works with a filesystem encrypted with cryptsetup/dm-crypt/LUKS.testdisk /dev/md0to repair a filesystem on top of a Linux RAID device.
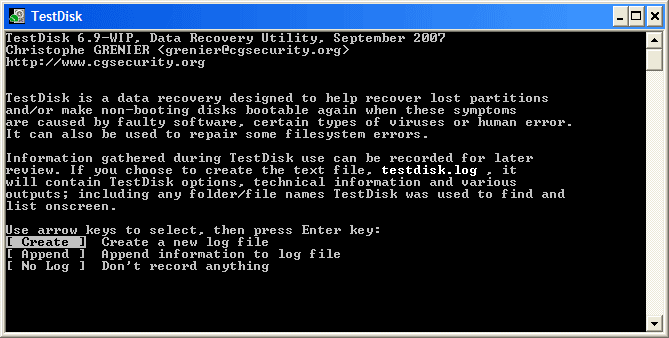
Log creation
|
- Choose Create unless you have a reason to append data to the log or if you execute TestDisk from read only media and must create it elsewhere.
- Press Enter to proceed.
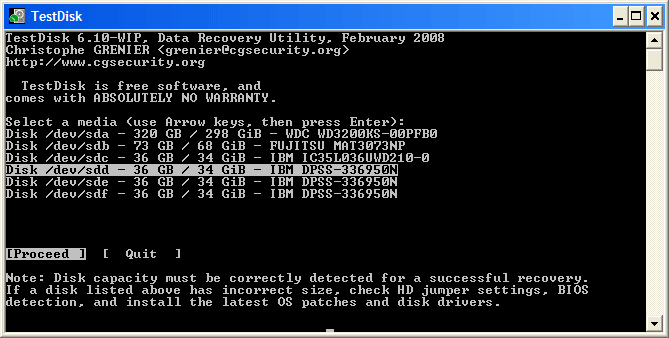
Disk selection
All hard drives should be detected and listed with the correct size by TestDisk.
|
- Use up/down arrow keys to select your hard drive with the lost partition/s.
- Press Enter to Proceed.
![]() If available, use raw device
If available, use raw device /dev/rdisk* instead of /dev/disk* for faster data transfer.
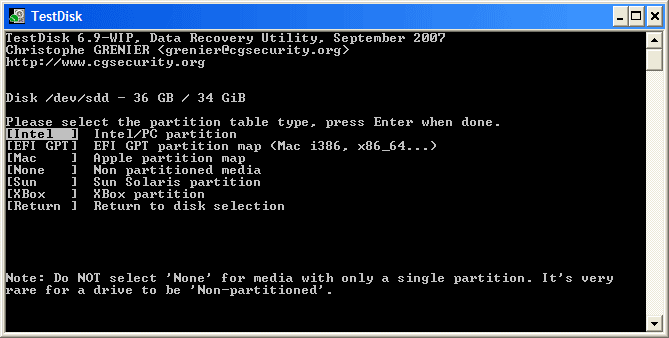
Partition table type selection
TestDisk displays the partition table types.
|
- Select the partition table type - usually the default value is the correct one as TestDisk auto-detects the partition table type.
- Press Enter to Proceed.
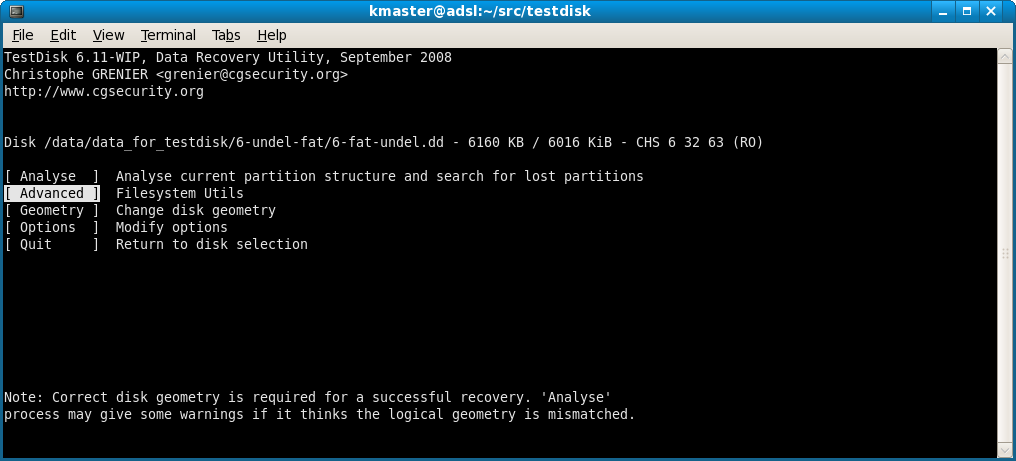
Start the undelete process
- Select Advanced
|
- Select the partition that was holding the lost files and choose Undelete
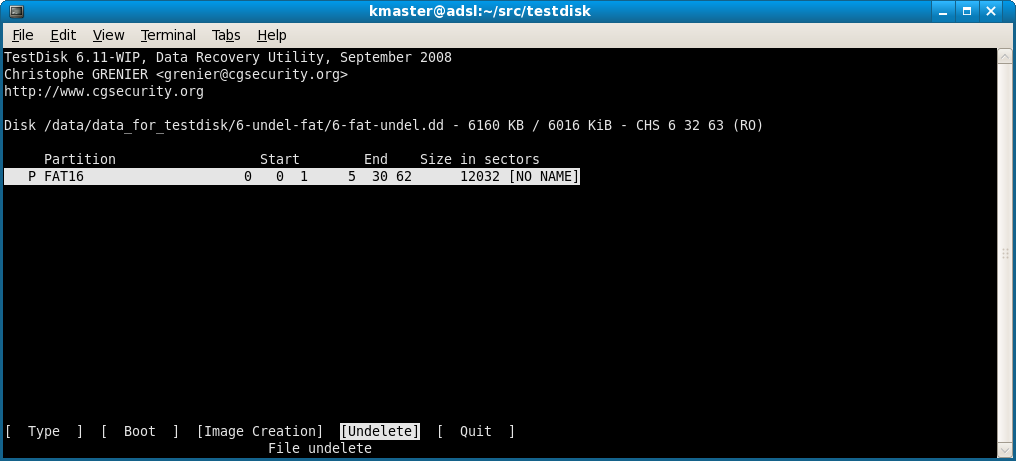
|
FAT file undelete
Deleted files and directories are displayed in red.
- To undelete a file, select the file to recover and press 'c' to copy the file.
- To recover a deleted directory, select the directory and press 'c' to undelete the directory and its content.
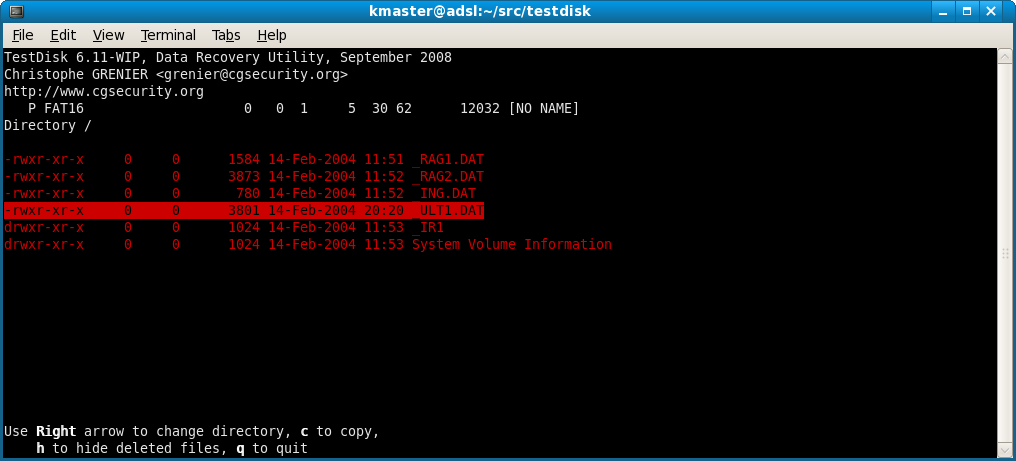
|
Select where recovered files should be written
Select the destination
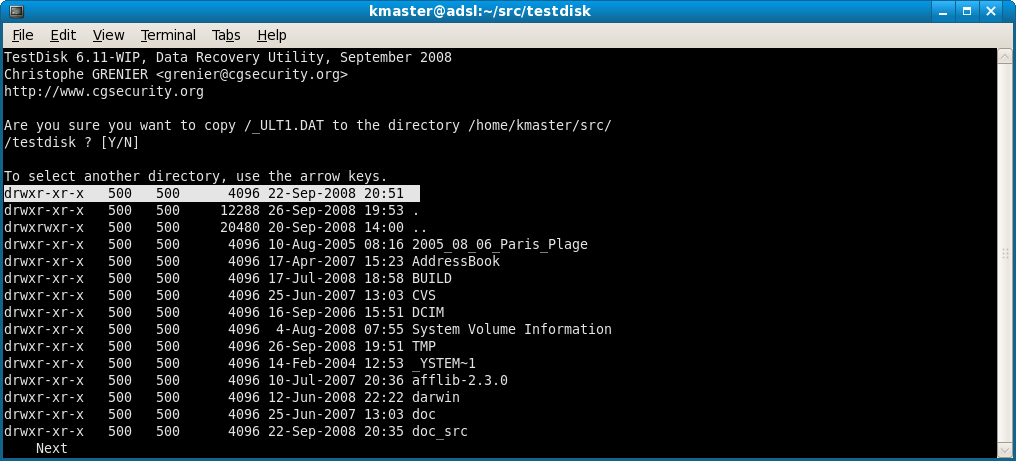
|
FAT file recovery is completed
When you get your files back, use Quit to exit.
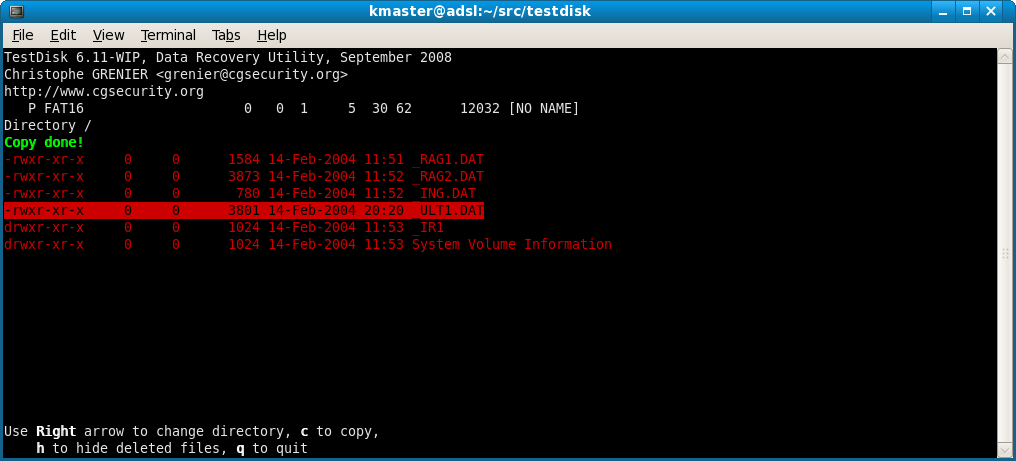
|
For maximum security, TestDisk doesn't try to unerase files but lets you copy the deleted files onto another partition or disk. Remember, you must avoid writing anything on the filesystem that was holding the data. If you do, deleted files may be overwritten by new ones.
TestDisk can undelete
- files and directory from FAT12, FAT16 and FAT32 filesystem,
- files from NTFS partition since version 6.11,
- files from ext2 filesystem.
If a lost file is still missing, give PhotoRec a try. PhotoRec is a signature based file recovery utility and may be able to recover your data where other methods have failed.